Apa itu PHP-FPM ?
PHP-FPM (FastCGI Process Manager) adalah alternatif untuk implementasi FastCGI untuk bahasa pemrograman PHP. PHP-FPM juga merupakan interpreter PHP yang terpisah dari web server, sehingga setiap request atas script PHP yang masuk ke web server akan diteruskan atau di forward ke FastCGI melalui socket koneksi TCP/IP.
PHP-FPM merupakan solusi yang lebih ringan dibandingkan menggunakan solusi tradisional Apache + modul PHP. PHP-FPM biasanya dipadukan dengan NGINX agar proses tidak besar.
Install PHP-FPM 8
1 2 3 4 5 6 7 8 | [root@iaasweb ~]# yum -y install epel-release && yum -y update [root@iaasweb ~]# yum -y install https://rpms.remirepo.net/enterprise/remi-release-7.rpm [root@iaasweb ~]# yum --enablerepo=remi-php80 install php [root@iaasweb ~]# yum -y update && yum -y install php php-cli php-fpm php-mysqlnd php-zip php-devel php-gd php-mcrypt php-mbstring php-curl php-xml php-pear php-bcmath php-json [root@iaasweb ~]# php -v PHP 8.0.26 (cli) (built: Nov 22 2022 17:44:09) ( NTS gcc x86_64 ) Copyright (c) The PHP Group Zend Engine v4.0.26, Copyright (c) Zend Technologies |
Install PHP-FPM 7.1
Ketika ingin melakukan upgrade/downgrade PHP harap pastikan untuk disable dan enable repo terbaru
1 2 3 4 5 6 | [root@iaasweb ~]# yum-config-manager --disable remi-php80 [root@iaasweb ~]# yum-config-manager --enable remi-php71 [root@iaasweb ~]# yum repolist [root@iaasweb ~]# yum remove -y php-cli mod_php php-common && yum autoremove [root@iaasweb ~]# yum -y update && yum -y install php php-cli [root@iaasweb ~]# yum -y install php php-cli php-fpm php-mysqlnd php-zip php-devel php-gd php-mcrypt php-mbstring php-curl php-xml php-pear php-bcmath php-json |
Install PHP-FPM 7.2
Ketika ingin melakukan upgrade/downgrade PHP harap pastikan untuk disable dan enable repo terbaru
1 2 3 4 5 6 | [root@iaasweb ~]# yum-config-manager --disable remi-php80 [root@iaasweb ~]# yum-config-manager --enable remi-php72 [root@iaasweb ~]# yum repolist [root@iaasweb ~]# yum remove -y php-cli mod_php php-common && yum autoremove [root@iaasweb ~]# yum -y update && yum -y install php php-cli [root@iaasweb ~]# yum -y install php php-cli php-fpm php-mysqlnd php-zip php-devel php-gd php-mcrypt php-mbstring php-curl php-xml php-pear php-bcmath php-json |
Install PHP-FPM 7.3
Ketika ingin melakukan upgrade/downgrade PHP harap pastikan untuk disable dan enable repo terbaru
1 2 3 4 5 6 | [root@iaasweb ~]# yum-config-manager --disable remi-php80 [root@iaasweb ~]# yum-config-manager --enable remi-php73 [root@iaasweb ~]# yum repolist [root@iaasweb ~]# yum remove -y php-cli mod_php php-common && yum autoremove [root@iaasweb ~]# yum -y update && yum -y install php php-cli [root@iaasweb ~]# yum -y install php php-cli php-fpm php-mysqlnd php-zip php-devel php-gd php-mcrypt php-mbstring php-curl php-xml php-pear php-bcmath php-json |
Install PHP-FPM 7.4
Ketika ingin melakukan upgrade/downgrade PHP harap pastikan untuk disable dan enable repo terbaru
1 2 3 4 5 6 | [root@iaasweb ~]# yum-config-manager --disable remi-php80 [root@iaasweb ~]# yum-config-manager --enable remi-php74 [root@iaasweb ~]# yum repolist [root@iaasweb ~]# yum remove -y php-cli mod_php php-common && yum autoremove [root@iaasweb ~]# yum -y update && yum -y install php php-cli [root@iaasweb ~]# yum -y install php php-cli php-fpm php-mysqlnd php-zip php-devel php-gd php-mcrypt php-mbstring php-curl php-xml php-pear php-bcmath php-json |
Untuk alasan keamanan saya akan mematikan cgi.fix-pathinfo di php.ini
1 2 | [root@iaasweb ~]# nano /etc/php.ini cgi.fix_pathinfo=0 |
Configuration
Setelah menentukan versi PHP yang akan digunakan, saya akhirnya memutuskan menggunakan PHP-FPM 8. Berikutnya adalah melakukan penambahan pada block vhosts subnginx.iaas.web.id. Saya akan melakukan beberapa konfigurasi diantaranya:
- Menambahkan php-fpm pada block server subnginx.iaas.web.id
- Mengedit file www.conf di /etc/php-fpm.d/
- Membuat file info.php di /var/www/subnginx.iaas.web.id/info.php
- Restart service NGINX
1 2 3 4 5 6 7 8 9 10 11 12 13 14 15 16 17 18 19 20 21 22 23 24 25 26 27 28 29 30 31 32 33 34 35 36 37 38 39 40 41 42 43 44 45 | [root@iaasweb ~]# nano /etc/nginx/sites-available/subnginx.iaas.web.id server { listen 80; listen [::]:80; root /var/www/subnginx.iaas.web.id; index index.html index.htm; server_name subnginx.iaas.web.id www.subnginx.iaas.web.id; location / { try_files $uri $uri/ =404; } location ~ \.php$ { try_files $uri =404; fastcgi_pass unix:/var/run/php-fpm/php-fpm.sock; fastcgi_index index.php; fastcgi_param SCRIPT_FILENAME $document_root$fastcgi_script_name; include fastcgi_params; } } [root@iaasweb ~]# nano /etc/php-fpm.d/www.conf ; RPM: apache user chosen to provide access to the same directories as httpd user = nginx ; RPM: Keep a group allowed to write in log dir. group = nginx ; Note: This value is mandatory. ; listen = 127.0.0.1:9000 listen = /var/run/php-fpm/php-fpm.sock ; Set permissions for unix socket, if one is used. In Linux, read/write ; permissions must be set in order to allow connections from a web server. ; Default Values: user and group are set as the running user ; mode is set to 0660 listen.owner = nginx listen.group = nginx listen.mode = 0660 [root@iaasweb ~]# echo "<?php phpinfo(); ?>" > /var/www/subnginx.iaas.web.id/info.php [root@iaasweb ~]# systemctl start php-fpm && systemctl enable php-fpm Created symlink from /etc/systemd/system/multi-user.target.wants/php-fpm.service to /usr/lib/systemd/system/php-fpm.service. [root@iaasweb ~]# systemctl restart nginx [root@iaasweb ~]# nginx -t nginx: the configuration file /etc/nginx/nginx.conf syntax is ok nginx: configuration file /etc/nginx/nginx.conf test is successful [root@iaasweb ~]# systemctl is-active php-fpm active |
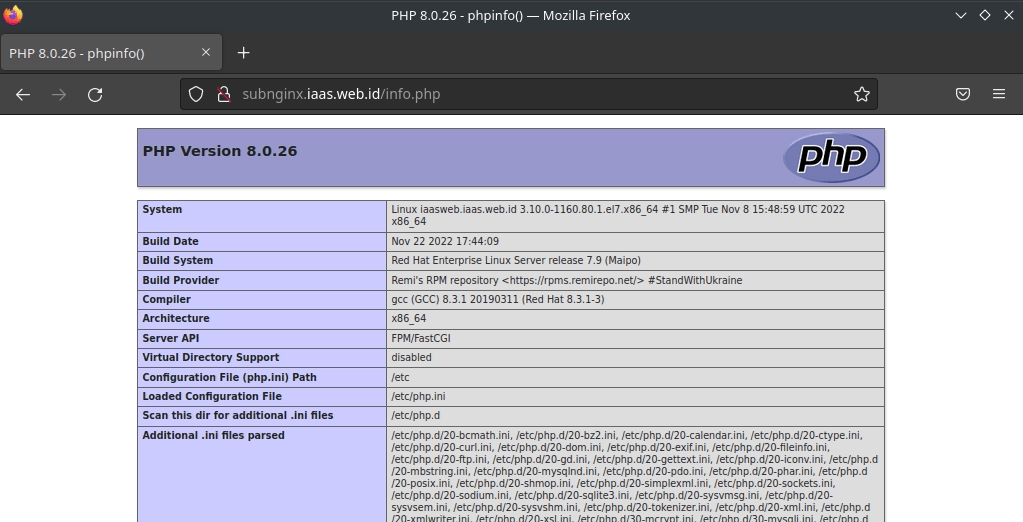
Setelah proses instalasi php-fpm dan konfigurasi vhosts selesai, akses Nginx melalui browser dan ketikkan http://vhosts.domain.tld
Install MySQL
Download MySQL melalui repositori resminya, kemudian verifikasi paketnya menggunakan MD5 untuk memastikan bahwa isi file tersebut aman dan tidak rusak
1 2 3 4 5 6 7 8 9 10 11 12 13 14 15 16 17 18 19 20 21 22 23 24 25 26 27 28 29 30 31 32 33 34 35 36 37 38 39 40 41 42 43 44 45 46 47 48 49 50 51 52 53 54 55 56 57 58 59 60 61 | [root@iaasweb ~]# curl -sSLO https://dev.mysql.com/get/mysql80-community-release-el7-5.noarch.rpm [root@iaasweb ~]# md5sum mysql80-community-release-el7-5.noarch.rpm e2bd920ba15cd3d651c1547661c60c7c mysql80-community-release-el7-5.noarch.rpm [root@iaasweb ~]# rpm -ivh mysql80-community-release-el7-5.noarch.rpm [root@iaasweb ~]# yum -y install mysql-server [root@iaasweb ~]# mysql --version mysql Ver 8.0.31 for Linux on x86_64 (MySQL Community Server - GPL) root@iaasweb ~]# mysql_secure_installation Securing the MySQL server deployment. Enter password for user root: New password: Re-enter new password: The 'validate_password' component is installed on the server. The subsequent steps will run with the existing configuration of the component. Using existing password for root. Estimated strength of the password: 100 Do you wish to continue with the password provided?(Press y|Y for Yes, any other key for No) : y By default, a MySQL installation has an anonymous user, allowing anyone to log into MySQL without having to have a user account created for them. This is intended only for testing, and to make the installation go a bit smoother. You should remove them before moving into a production environment. Remove anonymous users? (Press y|Y for Yes, any other key for No) : Y Success. Normally, root should only be allowed to connect from 'localhost'. This ensures that someone cannot guess at the root password from the network. Disallow root login remotely? (Press y|Y for Yes, any other key for No) : Y Success. By default, MySQL comes with a database named 'test' that anyone can access. This is also intended only for testing, and should be removed before moving into a production environment. Remove test database and access to it? (Press y|Y for Yes, any other key for No) : Y - Dropping test database... Success. - Removing privileges on test database... Success. Reloading the privilege tables will ensure that all changes made so far will take effect immediately. Reload privilege tables now? (Press y|Y for Yes, any other key for No) : Y Success. All done! |
Install phpMyAdmin
phpMyAdmin secara singkat adalah sistem untuk mengelola database melalui tampilan website. Berikutnya adalah melakukan instalasi phpmyadmin melalui repository remi-repo agar mendapatkan versi terbaru dari phpMyAdmin. Saya akan melakukan beberapa konfigurasi sebagai berikut:
- Install phpMyAdmin
- Membuat direktori snippets untuk menyimpan konfigurasi phpmyadmin.conf
- Membuat direktori /var/lib/php/sessions/
- Menyesuaikan permission direktori /var/lib/php/sessions/
- Menambahkan script include snippets/phpmyadmin.conf diantara block server vhost subnginx.iaas.web.id
- Restart service NGINX dan cek konfigurasi
1 2 3 4 5 6 7 8 9 10 11 12 13 14 15 16 17 18 19 20 21 22 23 24 25 26 27 28 | [root@iaasweb ~]# yum -y --enablerepo=remi install phpmyadmin [root@iaasweb ~]# mkdir -p /etc/nginx/snippets [root@iaasweb ~]# nano /etc/nginx/snippets/phpmyadmin.conf location /phpMyAdmin { root /usr/share/; index index.php index.html index.htm; location ~ ^/phpMyAdmin/(.+\.php)$ { root /usr/share/; try_files $uri =404; fastcgi_pass unix:/var/run/php-fpm/php-fpm.sock; fastcgi_index index.php; fastcgi_param SCRIPT_FILENAME $document_root$fastcgi_script_name; include fastcgi_params; } location ~* ^/phpMyAdmin/(.+\.(jpg|jpeg|gif|css|png|js|ico|html|xml|txt))$ { root /usr/share/; } } location /phpmyadmin { rewrite ^/* /phpMyAdmin last; } [root@iaasweb ~]# mkdir -p /var/lib/php/session/ [root@iaasweb ~]# chown -R nginx:nginx /var/lib/php/session/ [root@iaasweb ~]# chmod 755 /var/lib/php/session/ |
1 2 3 4 5 6 7 8 9 10 11 12 13 14 15 | [root@iaasweb ~]# nano /etc/nginx/sites-available/subnginx.iaas.web.id server { listen 80; listen [::]:80; root /var/www/subnginx.iaas.web.id; include snippets/phpmyadmin.conf; index index.html index.htm; server_name subnginx.iaas.web.id www.subnginx.iaas.web.id; location / { try_files $uri $uri/ =404; } [root@iaasweb ~]# nginx -t nginx: the configuration file /etc/nginx/nginx.conf syntax is ok nginx: configuration file /etc/nginx/nginx.conf test is successful |
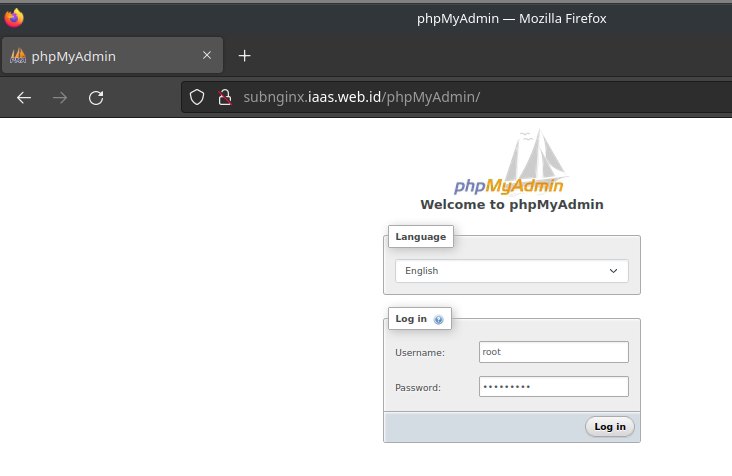
Setelah proses instalasi dan konfigurasi phpMyAdmin selesai, akses phpMyAdmin melalui browser dan ketikkan http://ip.address/phpmyadmin atau http://domain.tld/phpmyadmin